


Your page URL, also called a permalink or slug, plays a bigger role in your website’s success than most site owners realize. A clean, descriptive URL helps visitors and search engines understand what a page is about before they even click. A messy one, like a string of numbers and characters, does neither.
Many site owners assume a URL change is a simple, low-risk edit, right up until a redirect gets missed and a page starts throwing 404 errors. The reality is different. Getting it right takes more than editing a single field, which is why a reliable WordPress maintenance routine matters just as much as the URL change itself. This guide walks you through the safe way to do it, from preparation to the final Elementor-specific step most tutorials skip.
To change a page URL with Elementor, you edit the permalink through the standard WordPress dashboard settings, since Elementor does not have its own separate URL field. After saving the new slug, you should set up a 301 redirect from the old URL to the new one, then clear your Elementor cache and regenerate CSS to prevent any display errors on the page.
Why Your Page URL Matters More Than You Think
Every page URL sends a signal, both to the people who click it and to the search engines that rank it. A permalink like /how-to-change-url-elementor/ tells a visitor exactly what to expect. A permalink like /?p=456 tells them nothing.
Beyond first impressions, your URL structure affects:
- Search rankings. Search engines use the words in a URL as a minor ranking signal, and a descriptive slug supports your overall on-page SEO.
- Click-through rate. Clean URLs shown in search results tend to earn more clicks than long, auto-generated ones.
- Shareability. A readable link is easier to share, remember, and trust when a visitor sees it in an email or on social media.
Because this single field carries so much weight, changing it is not something to do on a whim, especially on a live, high-traffic page.
Preparation: What to Do Before Changing a URL
Never edit a permalink on a published page without taking a few precautions first. A successful URL change depends on preparation just as much as execution, and skipping this stage is where most avoidable mistakes happen.
Before touching anything, confirm you have a recent full backup of your files and database so you can undo the change if something goes wrong. A reliable WordPress backup is the single most effective safety net you have during any structural change, since it means a mistake costs you minutes rather than days. If you build primarily in the page builder, our guide to saving and backing up your Elementor projects covers the template and export options specific to Elementor.
Once your backup is in place, copy the exact existing permalink to a safe location, since you will need it to set up your redirect later. Then check where the page is linked from, including your navigation menus, internal links, and any marketing emails or ads pointing to it. Finally, choose a time of low traffic to make the change, so any brief disruption affects as few visitors as possible.
How to Change a Page URL in WordPress
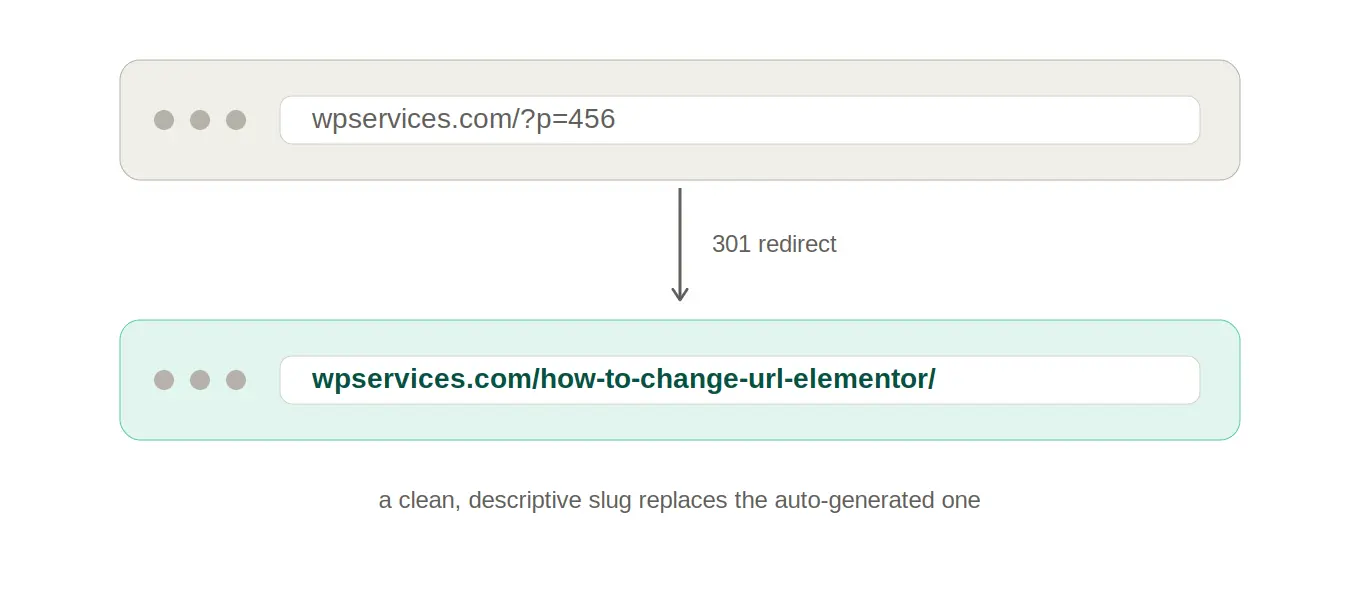
Elementor is a page builder that sits on top of WordPress, not a replacement for it. That means the permalink is edited in the standard WordPress dashboard rather than in the Elementor editor.
- Log in to your WordPress dashboard and go to Pages.
- Open the page you want to update, either in the block editor or by hovering over its title in the pages list.
- Find the Permalink field, usually shown just under the page title.
- Click Edit, type in your new slug, and click OK.
- Click Update to save the page with its new URL.
Keep the new slug short, descriptive, and free of unnecessary stop words. Some site owners prefer to set their permalink structure once, sitewide, rather than editing pages individually. Our guide to fine-tuning your Elementor site settings walks through the global Permalinks options under Settings.
The Elementor-Specific Step You Cannot Skip
This is the step most general WordPress tutorials skip, and it is why Elementor pages sometimes look broken right after a URL change.
Elementor generates and caches its own CSS files for every page, and in some setups, these cached assets reference the page by its old identifier. If you skip this step, you may see missing styles, layout shifts, or a page that loads without any Elementor formatting.
To fix this:
- In your WordPress dashboard, go to Elementor > Tools.
- Open the Regenerate CSS & Data tab.
- Click Regenerate Files & Data.
- Visit the page on the front end in an incognito or private browser window to confirm it displays correctly.
If the page still looks off after regenerating, clear any server-level or plugin-level caching tools you have installed, since these can serve an old, cached version of the page for a while after the change.
Setting Up a 301 Redirect

Once your new URL is live, the old one will return a 404 error to anyone who visits it, including search engines that have already indexed it. A 301 redirect solves this by automatically sending visitors and search engines from the old URL to the new one.
- Install a redirection plugin, such as Redirection, or use the redirect manager built into your SEO plugin if you already have one.
- Create a new redirect rule with the old URL as the source and the new URL as the target.
- Set the redirect type to 301 (Permanent), not 302, so search engines transfer the page’s existing ranking signals to the new URL.
- Save the rule, then test it by visiting the old URL directly to confirm it loads the new page.
Skipping this step is one of the fastest ways to lose the SEO value a page has already built up.
Updating Internal Links to the New URL
A redirect prevents broken links from showing an error, but it is still worth updating the links yourself rather than relying on redirects indefinitely. Search your:
- Main navigation and footer menus
- Internal links within other posts and pages
- Any Elementor templates or widgets that link directly to the page
Updating these directly, rather than routing every click through a redirect, keeps your site faster and easier for search engines to crawl.
Common Mistakes That Break Elementor Pages
- Skipping the redirect. This is the single most common cause of lost traffic after a URL change, since anyone with the old link bookmarked or indexed ends up hitting a dead end.
- Forgetting to regenerate Elementor CSS. This is what causes the styling glitches that make a perfectly good URL change look like it broke the page.
- Changing URLs in bulk without a plan. Renaming several pages at once without tracking the old and new pairs makes it easy to miss a redirect or an internal link.
- Leaving stale cache active. Browser or plugin caching can make it appear that your change did not save, even when it did.
Best Practices for Changing URLs Without Losing SEO
- Change URLs sparingly. Every change carries some SEO risk, so plan your permalink structure carefully before publishing a page rather than editing it repeatedly afterward.
- Test on staging first. If your hosting plan includes a staging environment, rehearse the change there before making it live.
- Keep a backup before every structural change. Backing up your Elementor website like a pro means any change you make stays reversible, so you can update URLs with confidence instead of hoping nothing breaks.
- Monitor after the change. Check Google Search Console over the coming weeks to confirm that the new URL is being indexed and that the old one is redirecting as expected.
- Document every change. Keep a simple record of old and new URLs for every page you rename, so nothing gets missed when you audit your redirects later.
Do not let redirects, backups, and site updates drain your time. Our team at WPServices handles every structural change to your site with care and precision, from the permalink itself to the redirect and cache steps most guides leave out.
Conclusion
Changing a page URL in Elementor is simple in theory: edit the permalink, save the page, and move on. In practice, a safe URL change also means backing up your site first, setting up a proper 301 redirect, regenerating Elementor’s cached CSS, and updating your internal links. Skip any one of these, and you risk broken pages, lost traffic, or a drop in your search rankings.
Take the time to do it right the first time, and a URL change becomes a quick, low-risk update rather than a source of downtime.
FAQs About Changing Page URLs in Elementor
Does Elementor have its own URL or permalink field?
No. Elementor builds the page content and design, but the URL itself is controlled by the standard WordPress permalink field, found on the page editor screen or under Settings > Permalinks for the sitewide structure.
Why does my Elementor page look broken after I changed the URL?
This usually happens because Elementor’s cached CSS files still reference the page’s previous state. Go to Elementor > Tools > Regenerate CSS & Data and regenerate the files to fix the display.
Do I need a redirect if I change a page URL?
Yes. Without a 301 redirect, anyone visiting the old URL, including search engines with it indexed, will land on a 404 error page. A redirect preserves both the visitor experience and the page’s existing SEO value.
Can changing a URL hurt my SEO ranking?
It can, if done without a proper 301 redirect and updated internal links. Done correctly, with a redirect in place and links updated, most pages retain their ranking within a few weeks.
Should I change a URL on a live, high-traffic page?
Only with caution. Back up your site, choose a low-traffic time window, and test the change on staging first if possible. For pages with significant existing traffic or backlinks, weigh whether the SEO benefit of a cleaner URL outweighs the temporary risk.

